Nginx与Apache的区别
Apache:扩展模块众多,功能强大,并发性能表现一般
Nginx:功能相对于Apache较少,但并发性能特别好。异步非阻塞方式
环境搭建
Linux网络配置
1 | ONBOOT=yes |
yum源软件安装
1 | [root@localhost ~]# mkdir /mnt/cdrom |
安装nginx
- 解压
[root@localhost LNMP]# tar -zxvf nginx-1.8.0.tar.gz - 编译
[root@localhost nginx-1.8.0]# ./configure --prefix=/usr/local/nginx - 安装
[root@localhost nginx-1.8.0]# make && make install - 启动
[root@localhost nginx-1.8.0]# /usr/local/nginx/sbin/nginx - 检查
1
2[root@localhost nginx-1.8.0]# netstat -tunple|grep 80
tcp 0 0 0.0.0.0:80 0.0.0.0:* LISTEN 0 24507 5148/nginx
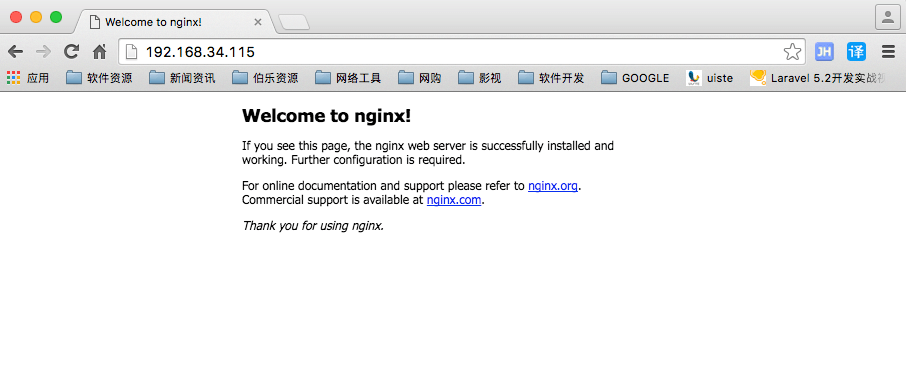
图示:
安装PHP服务
- 解压
[root@localhost LNMP]# tar -zxvf php-5.3.28.tar.gz - 编译(服务)
[root@localhost php-5.3.28]# ./configure --prefix=/usr/local/php --enable-fpm - 安装
[root@localhost php-5.3.28]# make && make install - 配置文件
[root@localhost php-5.3.28]# cp /usr/local/php/etc/php-fpm.conf.default /usr/local/php/etc/php-fpm.conf[root@localhost conf]# cp /home/LNMP/php-5.3.28/php.ini-development /usr/local/php/lib/php.ini 启动/重启
[root@localhost php-5.3.28]# /usr/local/php/sbin/php-fpm1
2
3
4
5
6
7[root@localhost conf]# ps -aux|grep php
Warning: bad syntax, perhaps a bogus '-'? See /usr/share/doc/procps-3.2.8/FAQ
root 4749 0.0 0.2 16256 2052 ? Ss 22:46 0:00 php-fpm: master process (/usr/local/php/etc/php-fpm.conf)
nobody 4750 0.0 0.2 16256 1724 ? S 22:46 0:00 php-fpm: pool www
nobody 4751 0.0 0.2 16256 1724 ? S 22:46 0:00 php-fpm: pool www
root 4759 0.0 0.0 5980 740 pts/0 S+ 22:53 0:00 grep php
[root@localhost conf]# kill -USR2 4749检查
1
2[root@localhost php-5.3.28]# netstat -tunple|grep 9000
tcp 0 0 127.0.0.1:9000 0.0.0.0:* LISTEN 0 86848 4749/php-fpm
nginx关联php
1 | [root@localhost php-5.3.28]# cd /usr/local/nginx/conf/ |
nginx配置文件
1 | #运行的用户 |
配置虚拟主机
修改主配置文件
1
2
3
4
5
6
7
8
9
10
11
12
13
14
15
16
17
18
19
20
21
22[root@localhost conf]# pwd
/usr/local/nginx/conf
[root@localhost conf]# vim nginx.conf
http {
include mime.types;
default_type application/octet-stream;
#log_format main '$remote_addr - $remote_user [$time_local] "$request" '
# '$status $body_bytes_sent "$http_referer" '
# '"$http_user_agent" "$http_x_forwarded_for"';
#access_log logs/access.log main;
sendfile on;
#tcp_nopush on;
#keepalive_timeout 0;
keepalive_timeout 65;
#gzip on;
include /usr/local/nginx/conf/vhost/*.conf;
}创建vhost目录
1
2
3
4
5
6
7
8
9
10
11
12
13
14
15
16
17
18[root@localhost vhost]# vim uiste.conf
server {
#监听80端口
listen 80;
server_name www.uiste.com;
root /usr/local/nginx/html/uiste; #虚拟主机站点根目录
#默认的匹配规则
location / {
index index.html index.htm;
}
location ~ \.php$ {
fastcgi_pass 127.0.0.1:9000;
fastcgi_index index.php;
include fastcgi.conf;
}
}
[root@localhost vhost]# mkdir /usr/local/nginx/html/uiste
[root@localhost vhost]# /usr/local/nginx/sbin/nginx -s reload
访问日志
nginx下访问日志是由配置项中的log_format跟access_log两个参数控制
log_format
作用:申明一个日志文件格式
语法:log_format 别名 具体的信息1
2
3log_format main '$remote_addr - $remote_user [$time_local] "$request" '
'$status $body_bytes_sent "$http_referer" '
'"$http_user_agent" "$http_x_forwarded_for"';access_log
作用:使用某种日志格式记录信息
语法:access_log 存储地址 使用的别名access_log logs/access.log main;访问日志中的参数
1
2
3
4
5
6
7
8
9$remote_addr:客户端的IP地址
$remote_user:客户端的用户信息 通过权限验证之后的用户信息
$time_local:时间及时区信息
$request:请求类型及协议请求的URL地址
$status:状态码
$body_bytes_sent:返回数据大小
$http_referer:请求的来源
$http_user_agent:客户的信息
$http_x_forwarded_for:真实客户端的IP地址,使用透传才能获取到真实客户端的IP地址
访问日志的申明只能写在http与sever之间,不能写在server配置中。访问日志可以申明多个。相对于server,http是全局设置,在虚拟主机设置使用访问日志,优先使用虚拟主机设置的格式,如果在虚拟主机中没有设置,但是在全局http中有开启使用访问日志,就会使用全局的格式记录
日志分割
crontab
1 | 基本格式 : |
思路
- 一个脚本
- 一个容器能够定时执行脚本
定时分割
创建cat_access.sh脚本
1
2
3
4
5
6
7
8
9
10
11
12[root@localhost uiste]# vim cat_access.sh
# /bin/bash
logs_path="/usr/local/nginx/logs/"
#以前的日志文件
log_name="access.log"
#指定nginx主进程号存储位置
pid_path="/usr/local/nginx/logs/nginx.pid"
mkdir -p ${logs_path}$(date -d "yesterday" +"%Y")/$(date -d "yesterday" +"%m")/
mv ${logs_path}access.log ${logs_path}$(date -d "yesterday" +"%Y")/$(date -d "yesterday" +"%m")/access_$(date -d "yesterday" +"%Y%m%d").log
#重新加载配置文件
kill -USR1 `cat ${pid_path}`修改cat_access.sh脚本为可执行文件
[root@localhost uiste]# chmod -R 777 cat_access.sh- 测试cat_access.sh脚本运行情况
[root@localhost uiste]# ./cat_access.sh 将脚本放入crontab中定时执行
1
2
[root@localhost uiste]# crontab -e
* * * * * /usr/local/nginx/html/uiste/cat_access.sh查看结果
[root@localhost uiste]# tail -f /var/log/cron
反向代理
- 建立测试文件(略)
修改主服务器配置文件实现反向代理
将其他的locatin都删除掉只留下一个 /的location1
2
3
4
5
6
7
8
9
10
11
12
13
14
15[root@localhost uiste]# cd /usr/local/nginx/conf/vhost
[root@localhost vhost]# vim uiste.conf
server {
#监听80端口
listen 80;
server_name www.uiste.com;
root /usr/local/nginx/html/uiste; #虚拟主机站点根目录
#默认的匹配规则
location / {
proxy_pass http://192.168.34.101;
index index.html index.htm;
}
}
[root@localhost vhost]# /usr/local/nginx/sbin/nginx -s reload测试
截图
负载均衡
192.168.34.105作为反向代理服务器
192.168.34.101真实处理请求的服务器
192.168.34.102真实处理请求的服务器
配置nginx主配置文件
1
2
3
4
5
6
7
8
9
10
11
12
13
14
15
16
17
18
19
20
21
22
23
24
25
26
27
28
29
30
31
32
33
34
35
36
37
38
39
40[root@localhost uiste]# vim /usr/local/nginx/conf/nginx.conf
http {
include mime.types;
default_type application/octet-stream;
log_format main '$remote_addr - $remote_user [$time_local] "$request" '
'$status $body_bytes_sent "$http_referer" '
'"$http_user_agent" "$http_x_forwarded_for"';
access_log logs/access.log main;
# 配置代理服务器
upstream web{
server 192.168.34.101;
server 192.168.34.102;
}
sendfile on;
#tcp_nopush on;
#keepalive_timeout 0;
keepalive_timeout 65;
#gzip on;
include /usr/local/nginx/conf/vhost/*.conf;
}
[root@localhost uiste]# vim /usr/local/nginx/conf/vhost/uiste.conf
server {
#监听80端口
listen 80;
server_name www.uiste.com;
root /usr/local/nginx/html/uiste; #虚拟主机站点根目录
#默认的匹配规则
location / {
proxy_pass http://web; #反向代理一组服务器
index index.html index.htm;
}
}
[root@localhost vhost]# /usr/local/nginx/sbin/nginx -s reload测试效果
upstream语法说明
语法:1
2
3Upstream 别名{
Server IP地址/域名 参数;
}
参数:1
2
3
4
51、down标注服务器为关闭状态,不参与负载均衡
2、weight=number:权重按照轮循的方式依据权重实现不同的负载
3、max_fails=number:最大失败次数
4、fail_timeout=number:超时时间
5、backup :表示为备用服务器。
负载均衡算法:
- 轮循
- 权重
- 最小连接
- ip_hash
nginx重启报错
1
2
3
4[root@localhost vhost]# /usr/local/nginx/sbin/nginx -s reload
nginx: [error] open() "/usr/local/nginx/logs/nginx.pid" failed (2: No such file or directory)
#解决方法:
`[root@localhost logs]# /usr/local/nginx/sbin/nginx -c /usr/local/nginx/conf/nginx.conf`
使用nginx-c的参数指定nginx.conf文件的位置